> For the complete documentation index, see [llms.txt](https://docs.swiftproxy.net/llms.txt). Markdown versions of documentation pages are available by appending `.md` to page URLs; this page is available as [Markdown](https://docs.swiftproxy.net/proxies/integration-and-usage/static-residential-proxies-integration/ghost-browser.md).
# Ghost Browser
## **Why choose Ghost Browser?**
As a professional fingerprint browser, Ghost Browser has the following core advantages:
1. Independent session management: Create a completely isolated browser environment for each tab through the Session mechanism to avoid account association.
2. Efficient workflow: Supports setting up independent agents for different sessions, and can quickly distinguish accounts through color marking and naming.
3. Cross-platform adaptation: Developed based on Chromium, it has strong compatibility and is suitable for multi-account operation scenarios such as social media and e-commerce.
Its lightweight design and intuitive user interface are especially suitable for users who need to switch accounts frequently.
## **How to configure Ghost Browser with Swiftproxy Static Residential Proxy?**
### **Step 1: Get Proxy Information and Download**
1. Download Ghost Browser from the [official website](https://ghostbrowser.com/).
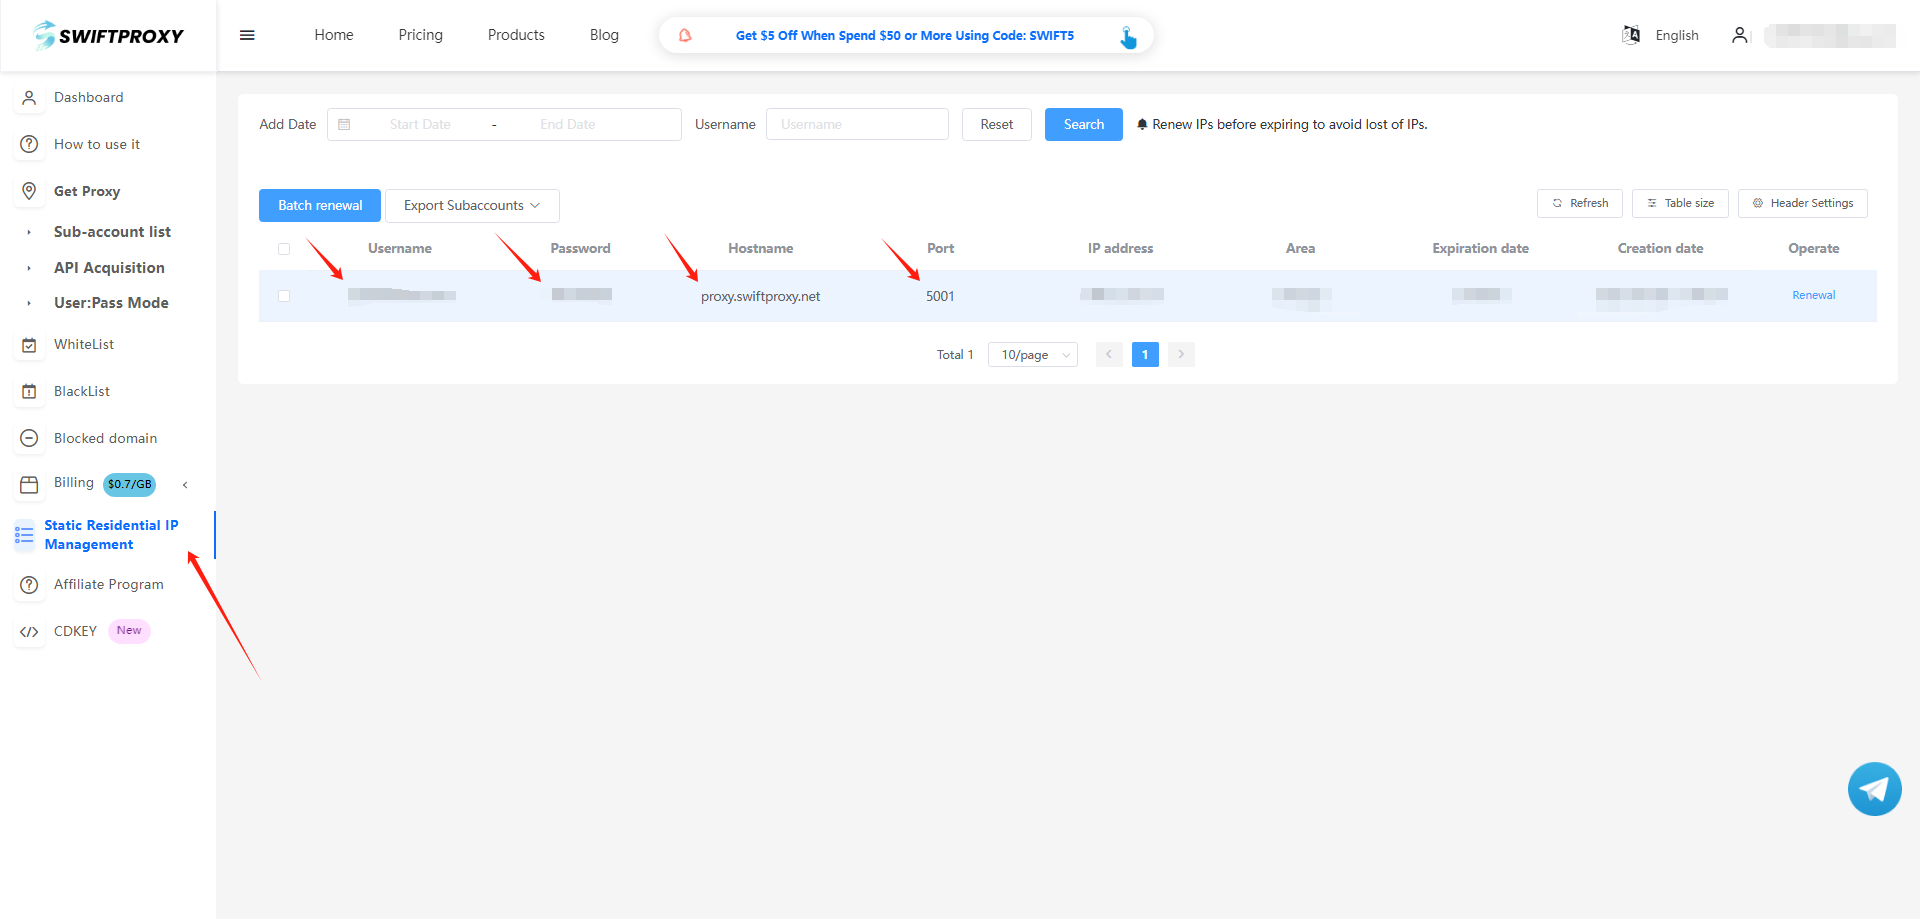
2. Visit the [Swiftproxy dashboard](https://www.swiftproxy.net/user/ucenter) and copy Username, Password, Hostname, and Port.
### **Step 2: Configure Swiftproxy in Ghost Browse**
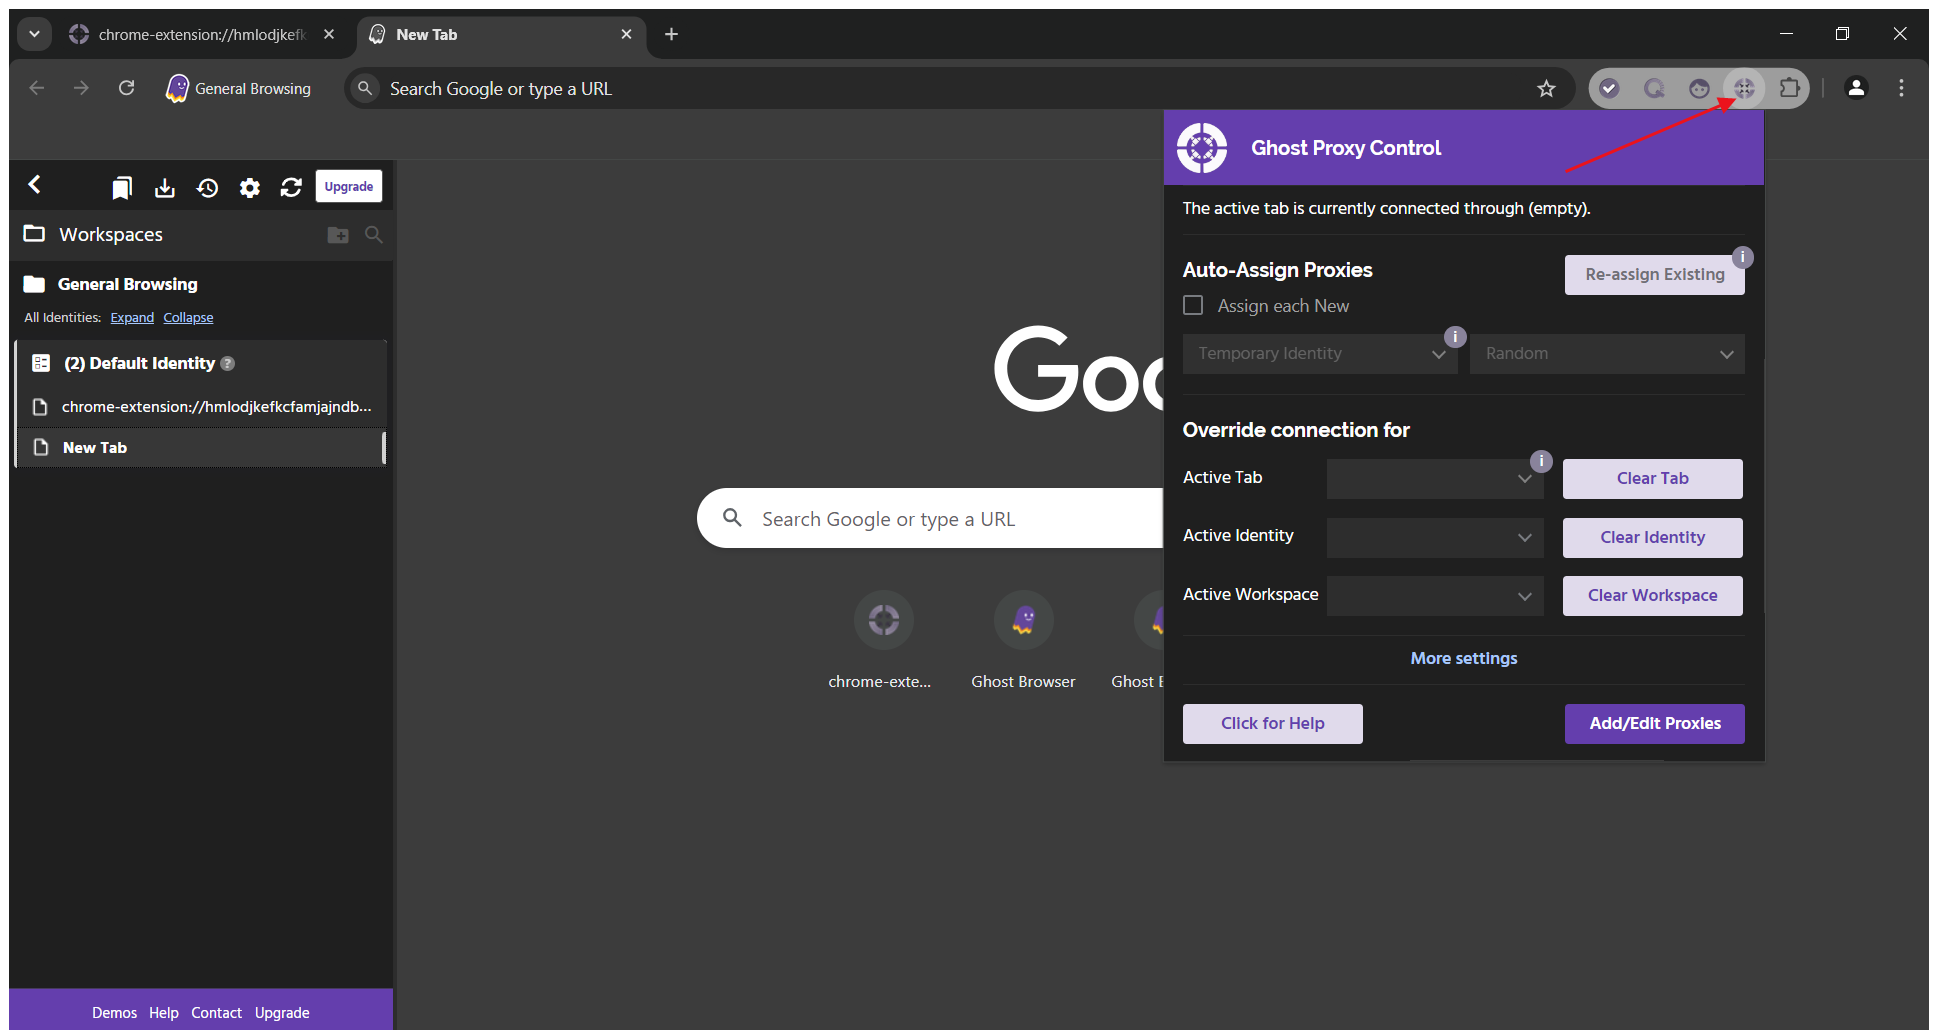
1. Register and log in. Open Ghost Browser and click the gear icon in the upper right corner.
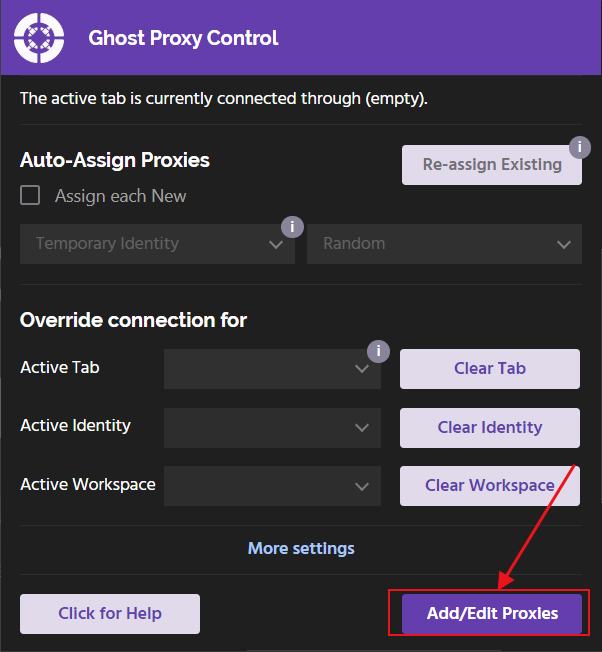
2. Click "Add/Edit Proxies" to jump to the "Ghost Proxy Control" page.
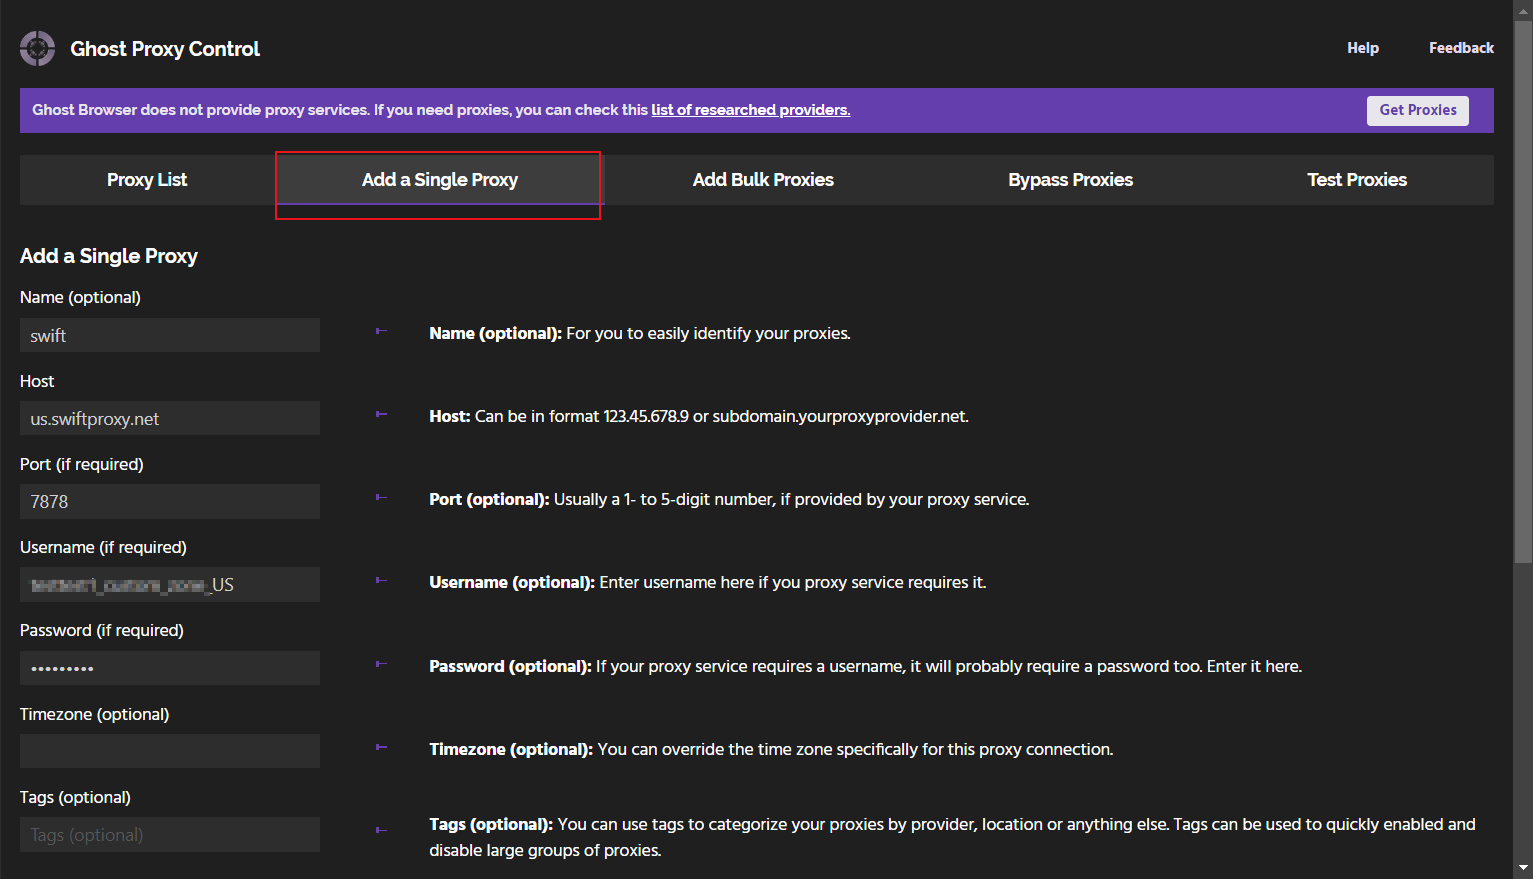
3. Next, click "Add a Single Proxy". After filling in the name, paste Username, Password, Hostname, and Port in turn.
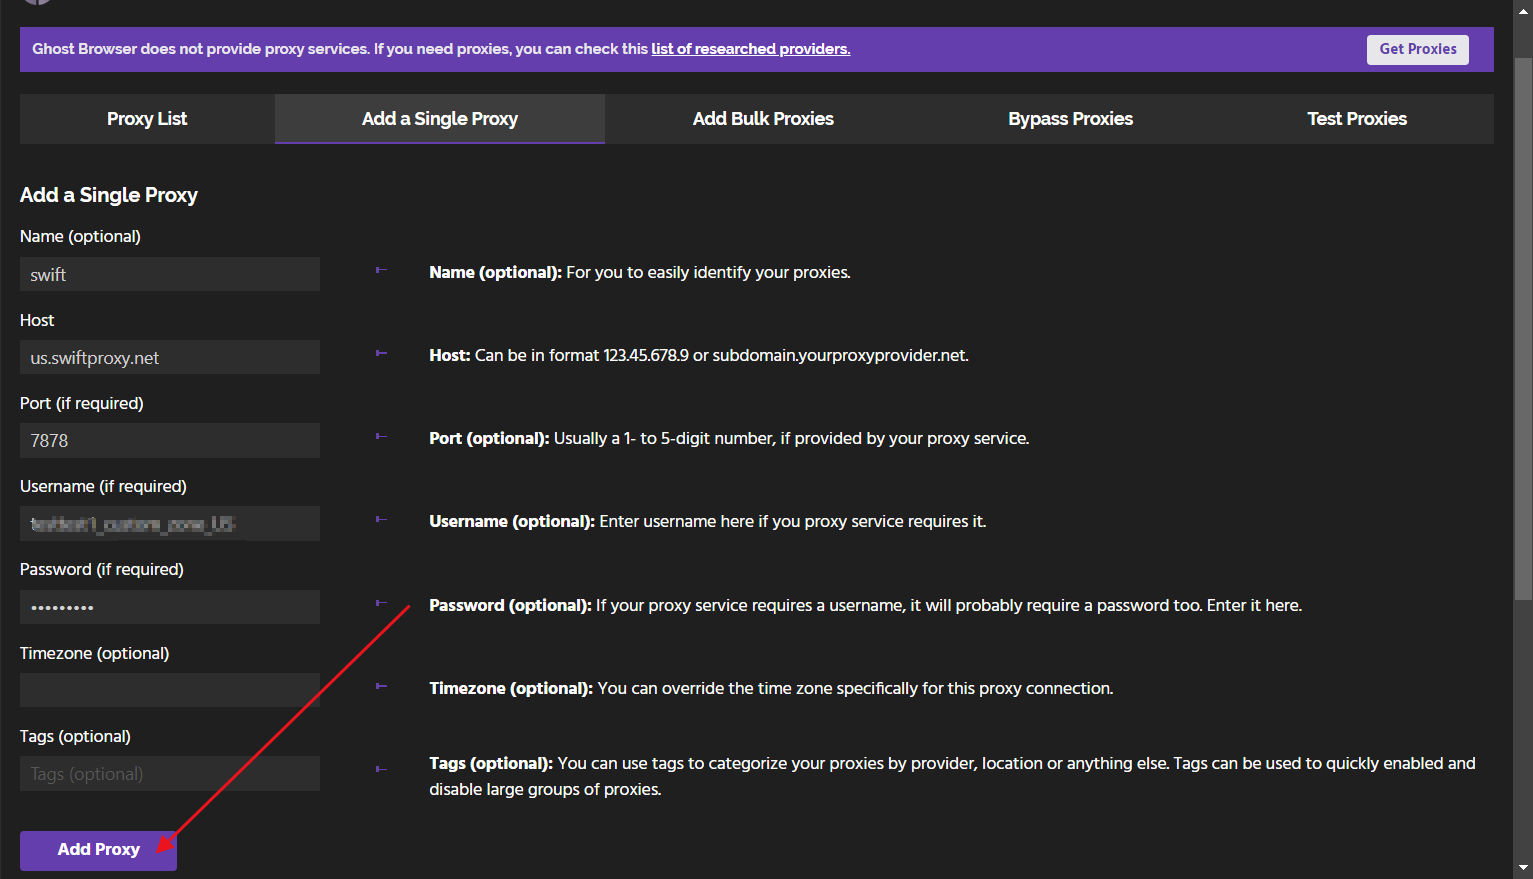
4. Click "Add Proxy" to save.
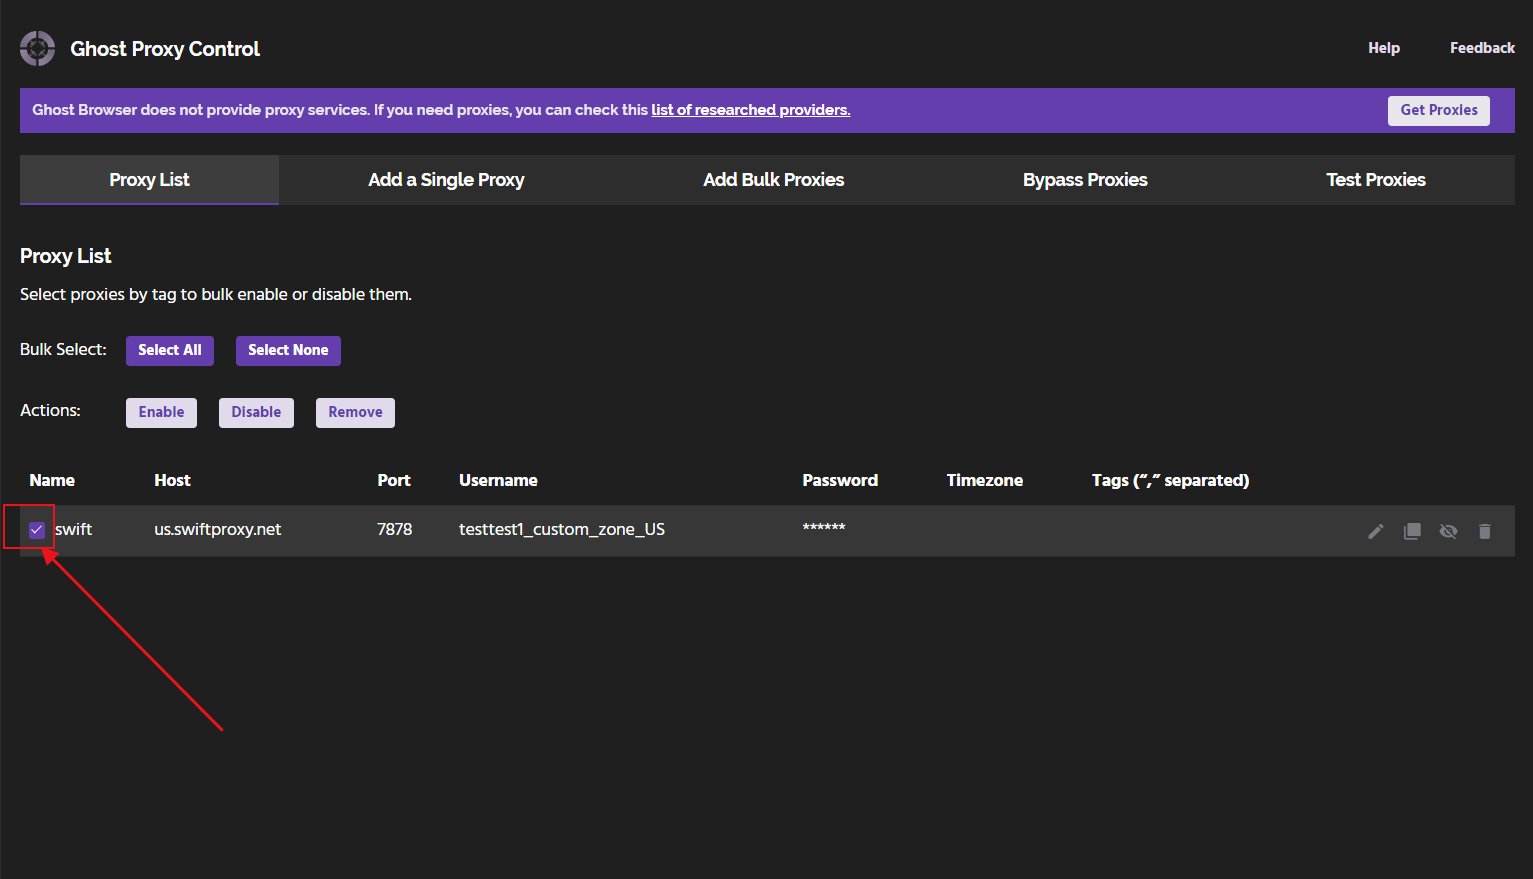
5. In the proxy list, select the created proxy.
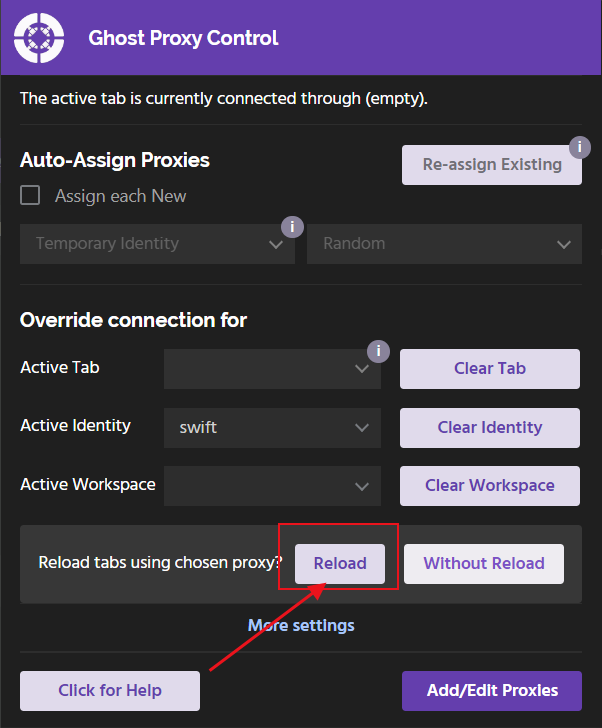
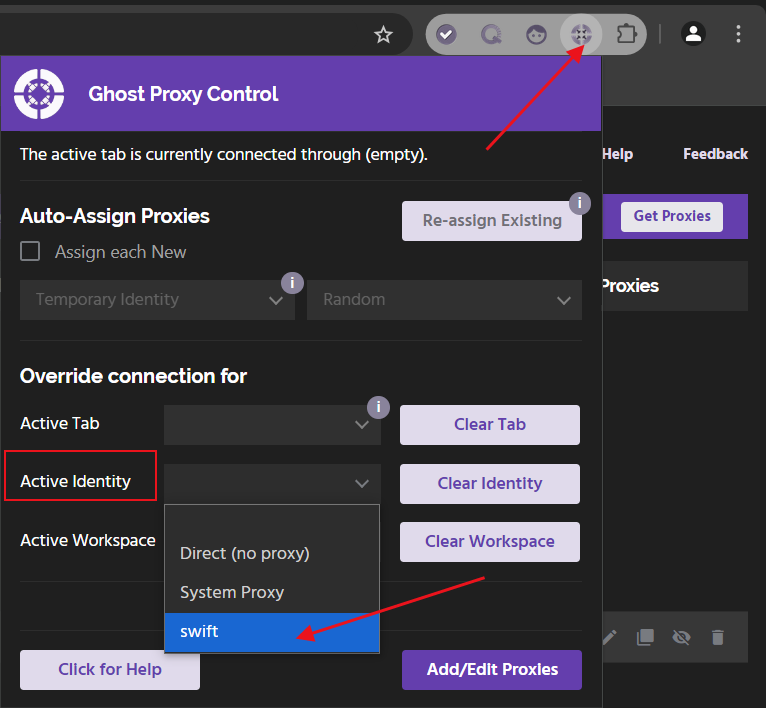
6. Click the gear icon in the upper right corner again, and in the "Active Identity" option, select the proxy you just created.
7. Click "Reload" to use Swiftproxy for network connection.
 7. Click "Reload" to use Swiftproxy for network connection.