> For the complete documentation index, see [llms.txt](https://docs.swiftproxy.net/llms.txt). Markdown versions of documentation pages are available by appending `.md` to page URLs; this page is available as [Markdown](https://docs.swiftproxy.net/proxies/integration-and-usage/residential-proxies-integration/brave-browser.md).
# Brave Browser
## **What is choose Brave Browser?**
Brave is a privacy-first browser based on Chromium, focusing on privacy protection, built-in ad blocking and tracking protection functions, and providing a cryptocurrency reward mechanism. It is a browser that takes into account the three core elements of privacy, speed, and revenue.
## **How to configure Brave browser with Swiftproxy Residential Proxy?**
### ▶️ **Video Tutorial**
{% embed url="" %}
### **Step 1: Get Proxy Information and Download**
1. Download Brave browser from the [official website](https://brave.com/).
2. Visit the Swiftproxy website to get your proxy IPs.
* [**API Acquisition**](/proxies/residential-proxies/get-proxy/api-acquisition.md)
* [**Username and Password Authentication**](/proxies/residential-proxies/get-proxy/user-and-password-verification.md)
### **Step 2: Configure Swiftproxy in Brave browser**
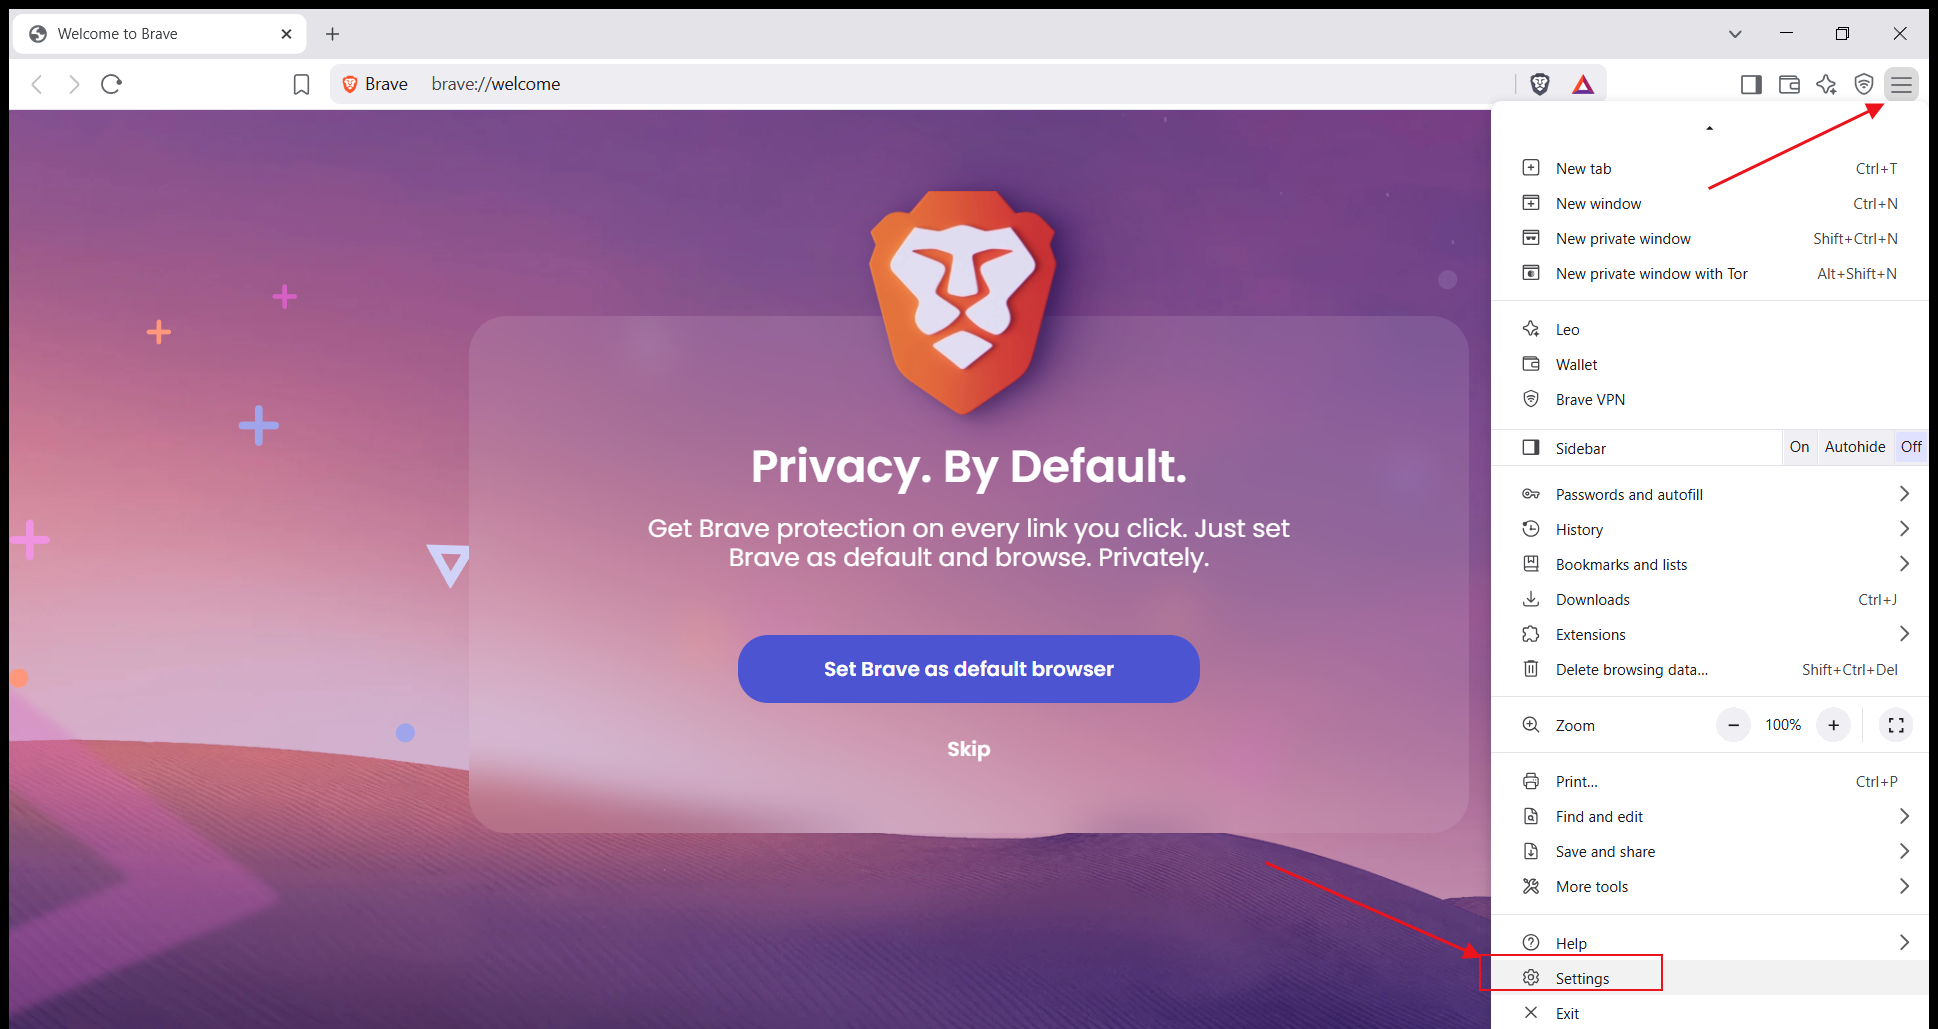
1. Open the Brave browser, click the three-line icon in the upper right corner to enter the menu bar, and select "Settings."
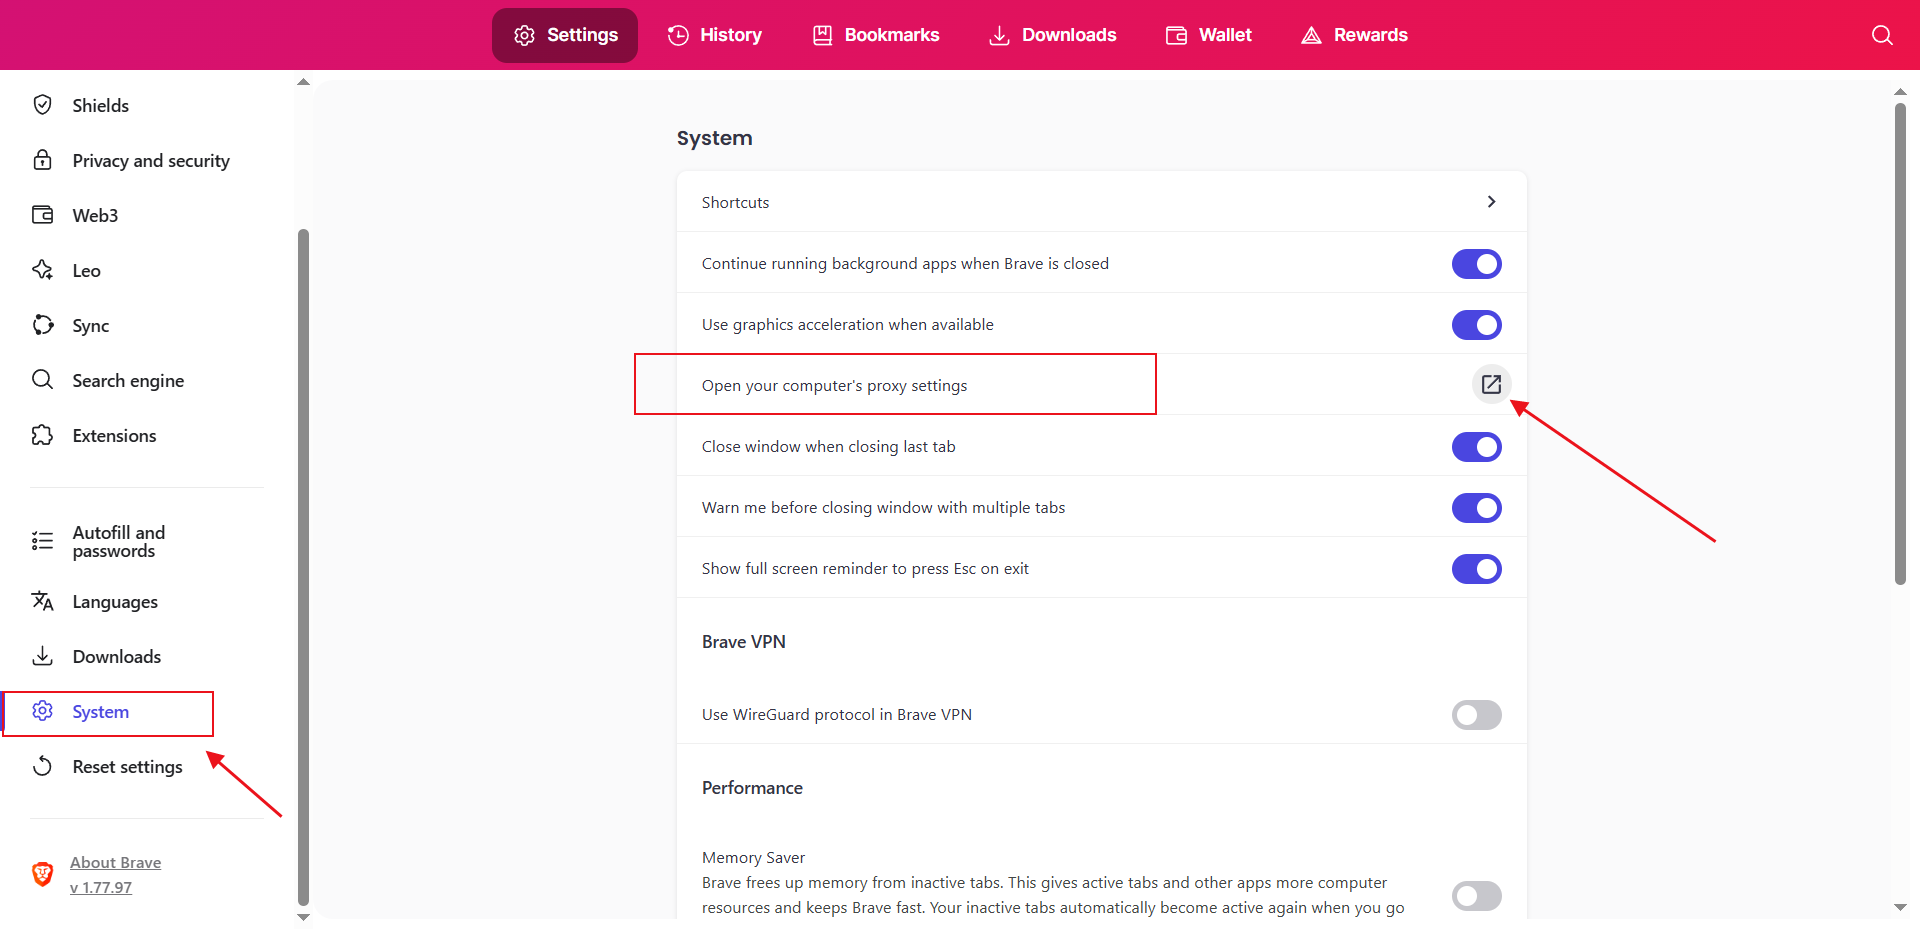
 2. In the "Settings" interface, click "System", find the "Open your computer's proxy settings" option, and click it.
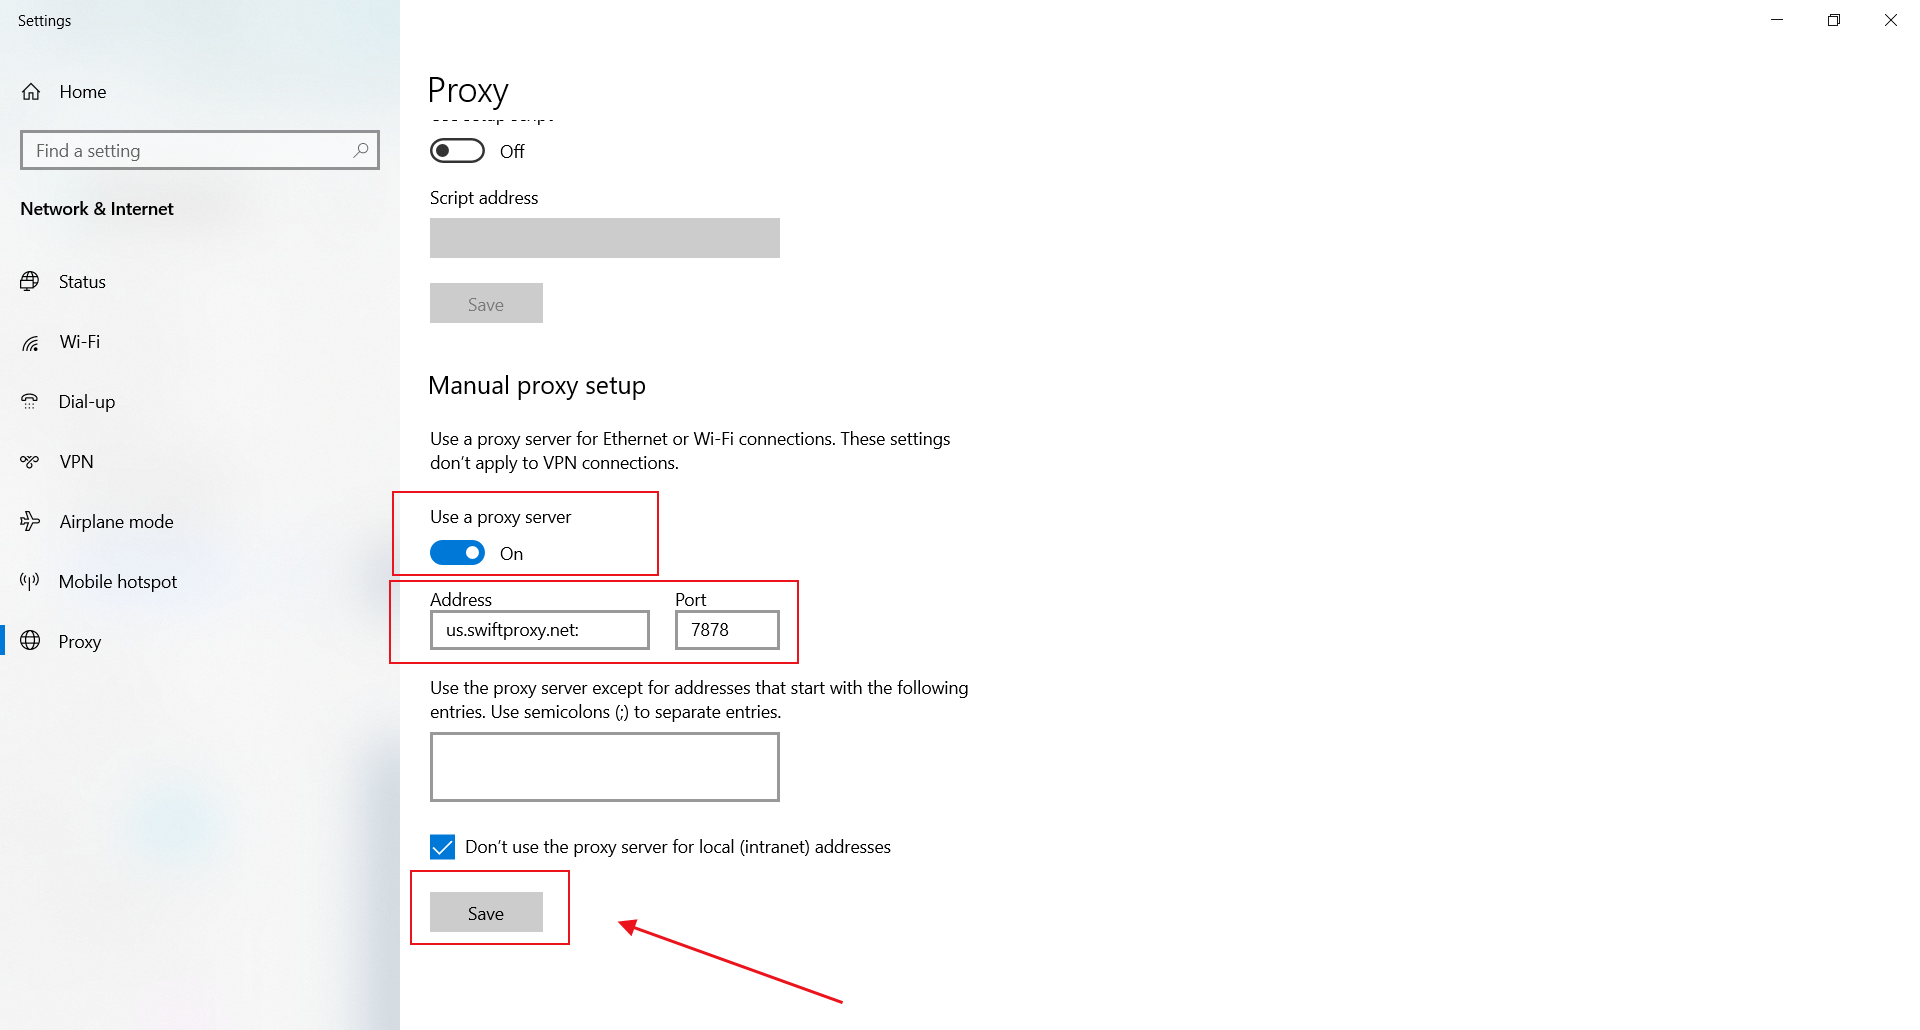
 3. In the pop-up system settings page, turn on the "Use a proxy server" button, enter proxy information from the Swiftproxy dashboard just obtained, and click Save.\
**Note**: You can find the required proxy details in **Step 1.**
3. In the pop-up system settings page, turn on the "Use a proxy server" button, enter proxy information from the Swiftproxy dashboard just obtained, and click Save.\
**Note**: You can find the required proxy details in **Step 1.**
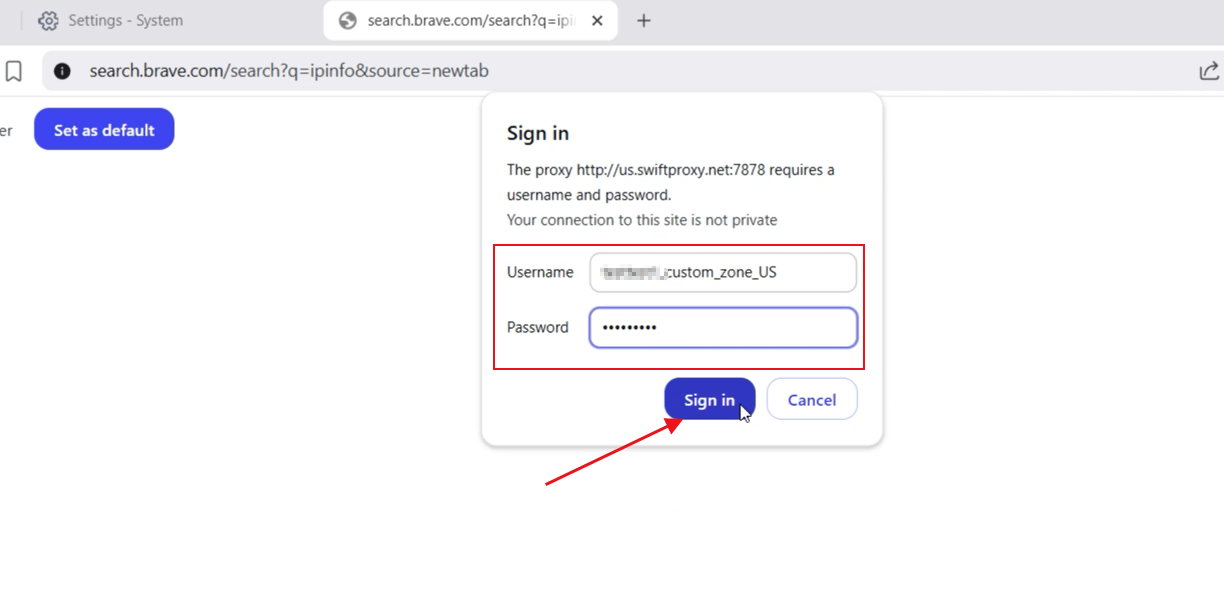
 4. When you return to the Brave browser to open a new web page, a pop-up window will appear, prompting you to enter "username" and "password" to log in, enter the Swiftproxy web page, copy the corresponding fields, paste them, and log in.
 ---
# Agent Instructions
This documentation is published with GitBook. GitBook is the documentation platform designed so that both humans and AI agents can read, navigate, and reason over technical content effectively. Learn more at gitbook.com.
## Querying This Documentation
If you need additional information that is not directly available in this page, you can query the documentation dynamically by asking a question.
Perform an HTTP GET request on the current page URL with the `ask` query parameter:
```
GET https://docs.swiftproxy.net/proxies/integration-and-usage/residential-proxies-integration/brave-browser.md?ask=
```
The question should be specific, self-contained, and written in natural language.
The response will contain a direct answer to the question and relevant excerpts and sources from the documentation.
Use this mechanism when the answer is not explicitly present in the current page, you need clarification or additional context, or you want to retrieve related documentation sections.
---
# Agent Instructions
This documentation is published with GitBook. GitBook is the documentation platform designed so that both humans and AI agents can read, navigate, and reason over technical content effectively. Learn more at gitbook.com.
## Querying This Documentation
If you need additional information that is not directly available in this page, you can query the documentation dynamically by asking a question.
Perform an HTTP GET request on the current page URL with the `ask` query parameter:
```
GET https://docs.swiftproxy.net/proxies/integration-and-usage/residential-proxies-integration/brave-browser.md?ask=
```
The question should be specific, self-contained, and written in natural language.
The response will contain a direct answer to the question and relevant excerpts and sources from the documentation.
Use this mechanism when the answer is not explicitly present in the current page, you need clarification or additional context, or you want to retrieve related documentation sections.