> For the complete documentation index, see [llms.txt](https://docs.swiftproxy.net/llms.txt). Markdown versions of documentation pages are available by appending `.md` to page URLs; this page is available as [Markdown](https://docs.swiftproxy.net/proxies/integration-and-usage/residential-proxies-integration/waterfox-browser.md).
# Waterfox Browser
## **What is Waterfox Browser?**
Waterfox is a 64-bit browser developed based on Mozilla Firefox open source code, focusing on privacy protection and performance optimization.
**Core features**
* Privacy first: User tracking, telemetry reporting, and advertising plug-ins (such as Pocket) are disabled by default to strictly protect user data.
* 64-bit performance: Optimized for 64-bit systems, using SSE/AVX instruction sets and the Intel C++ compiler, it runs faster than native Firefox.
* Extension compatibility: Fully supports Firefox's extension ecosystem, and users can freely install various plug-ins.
## **How to configure Waterfox browser with Swiftproxy Residential Proxy?**
### ▶️ **Video Tutorial**
{% embed url="" %}
### **Step 1: Get Proxy Information and Download**
1. Download Waterfox browser from the [official website](https://www.waterfox.net/).
2. Visit the Swiftproxy website to get your proxy IPs.
* [**API Acquisition**](/proxies/residential-proxies/get-proxy/api-acquisition.md)
* [**Username and Password Authentication**](/proxies/residential-proxies/get-proxy/user-and-password-verification.md)
### **Step 2: Configure Swiftproxy in Waterfox Browser**
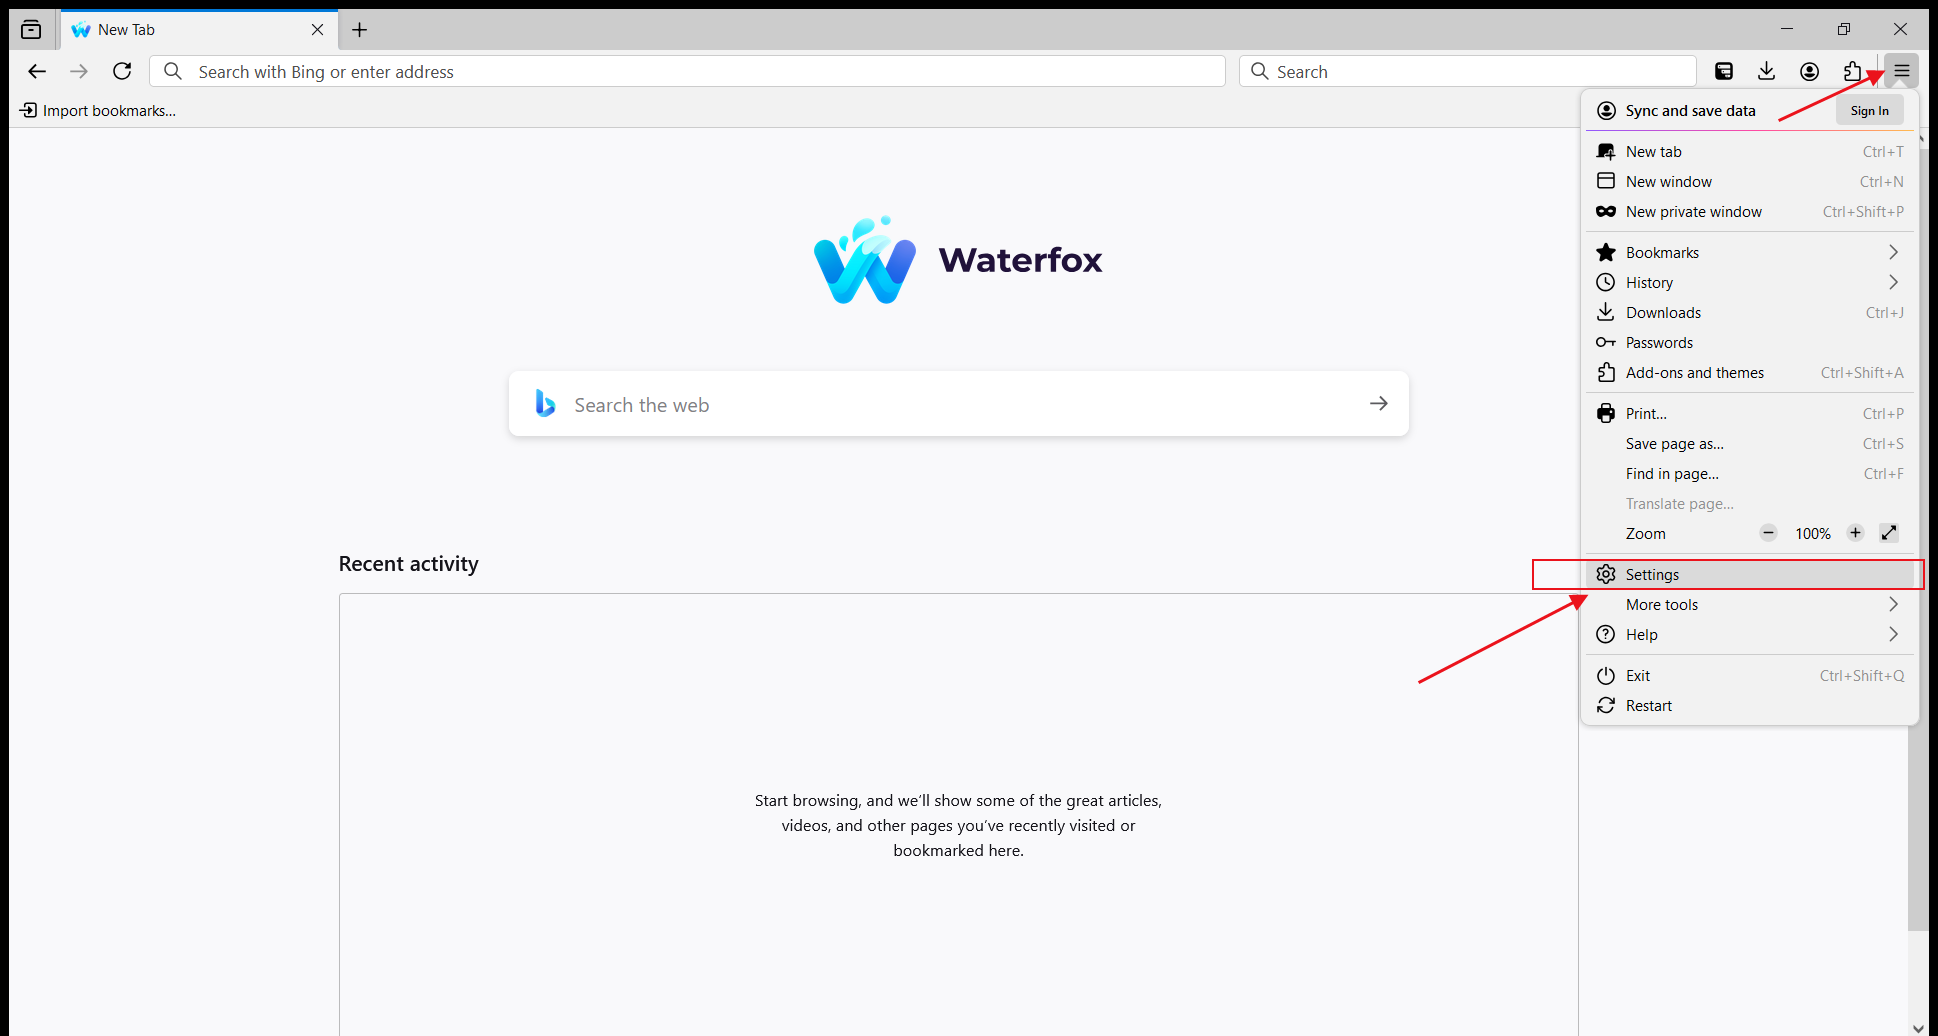
1. Open Waterfox, click the menu in the upper right corner, and select "Settings".
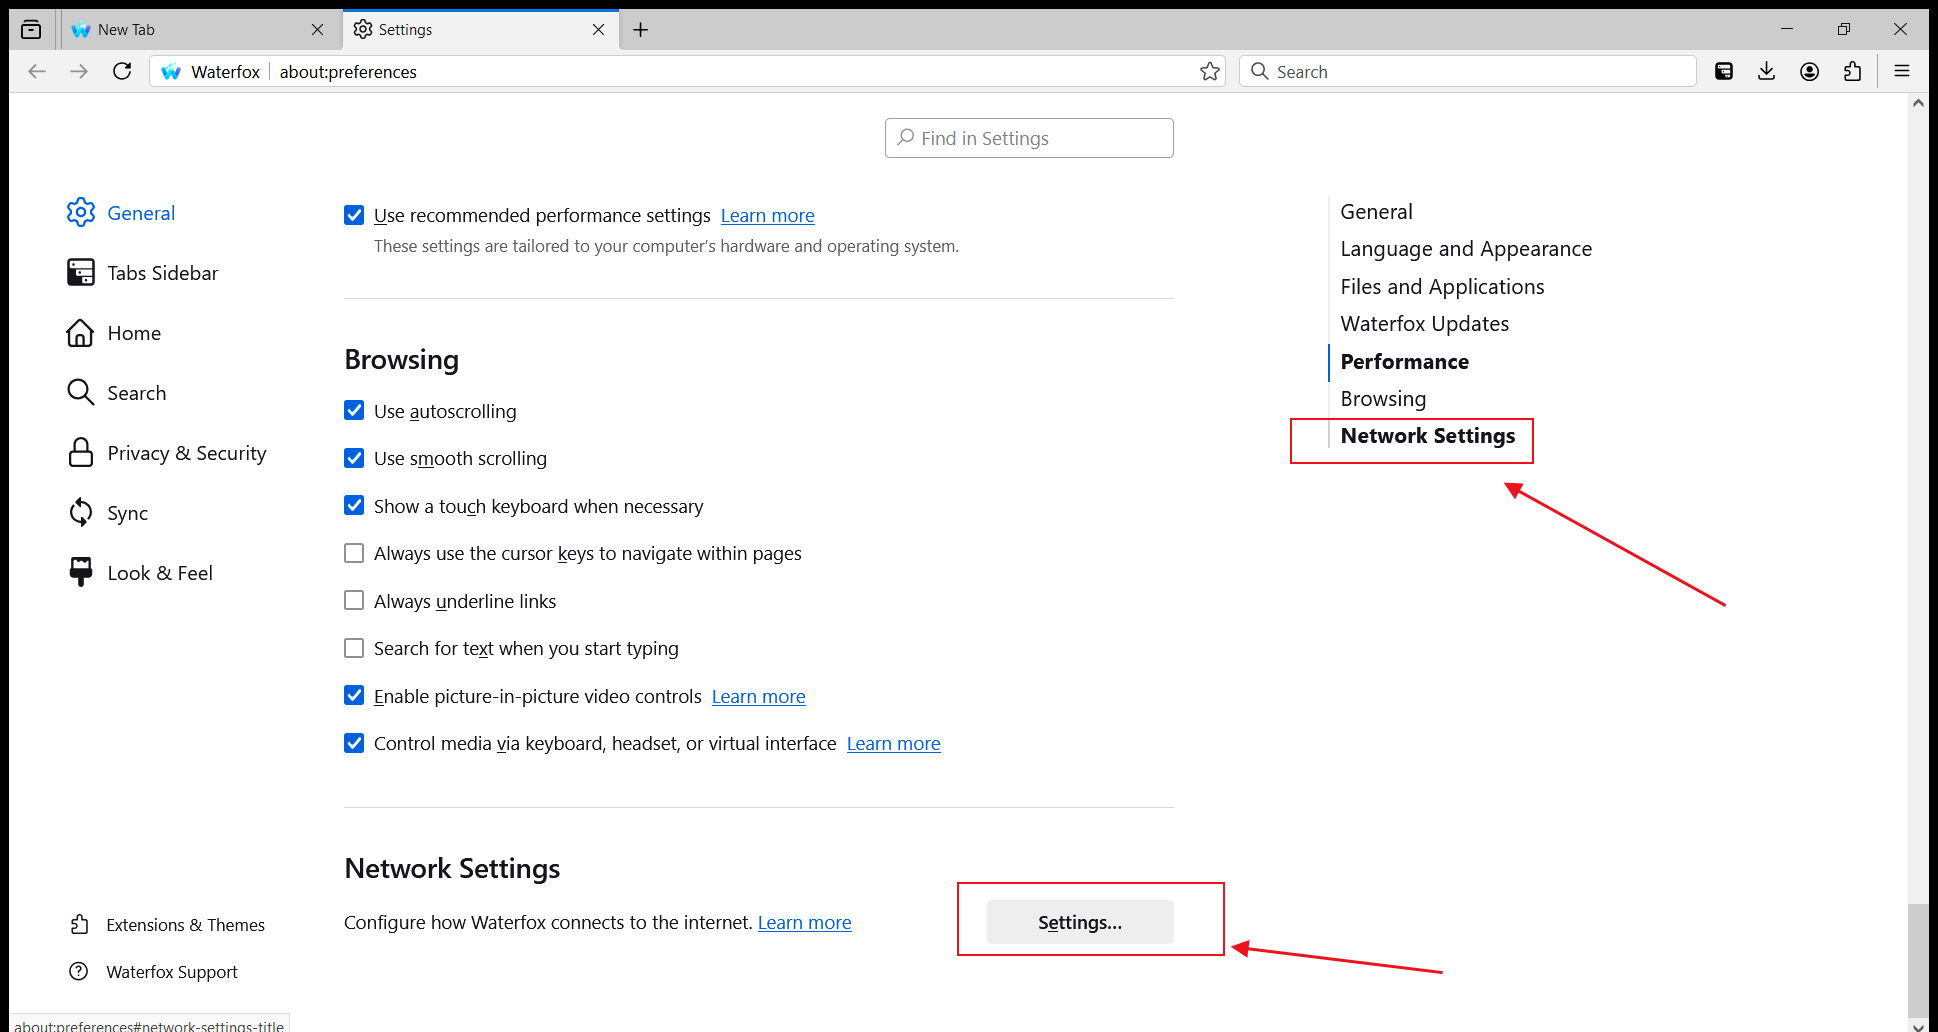
 2. In the options on the right, select "Network Settings" and click to enter the settings.
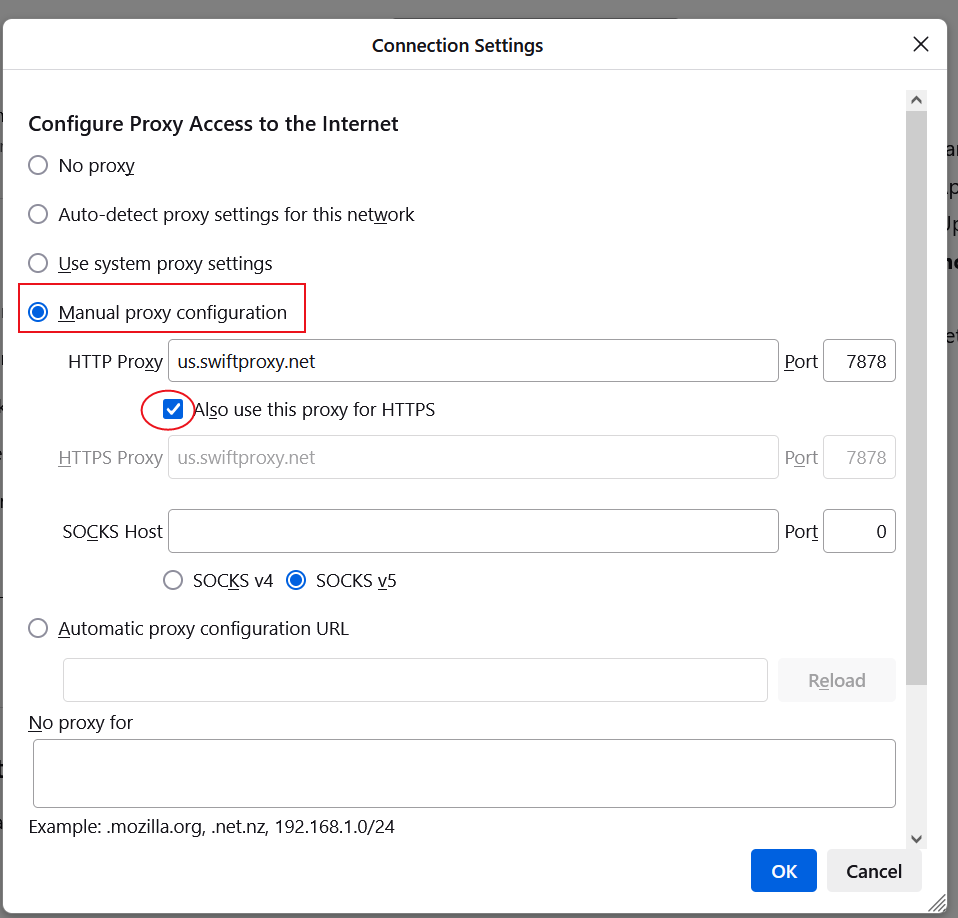
 3. In "Connection Settings", select "Manual proxy configuration", then fill in the HTTP proxy server address and port number provided by Swiftproxy and check "Also use this proxy for HTTPS".\
**Note**: You can find the required proxy details in **Step 1**.
3. In "Connection Settings", select "Manual proxy configuration", then fill in the HTTP proxy server address and port number provided by Swiftproxy and check "Also use this proxy for HTTPS".\
**Note**: You can find the required proxy details in **Step 1**.
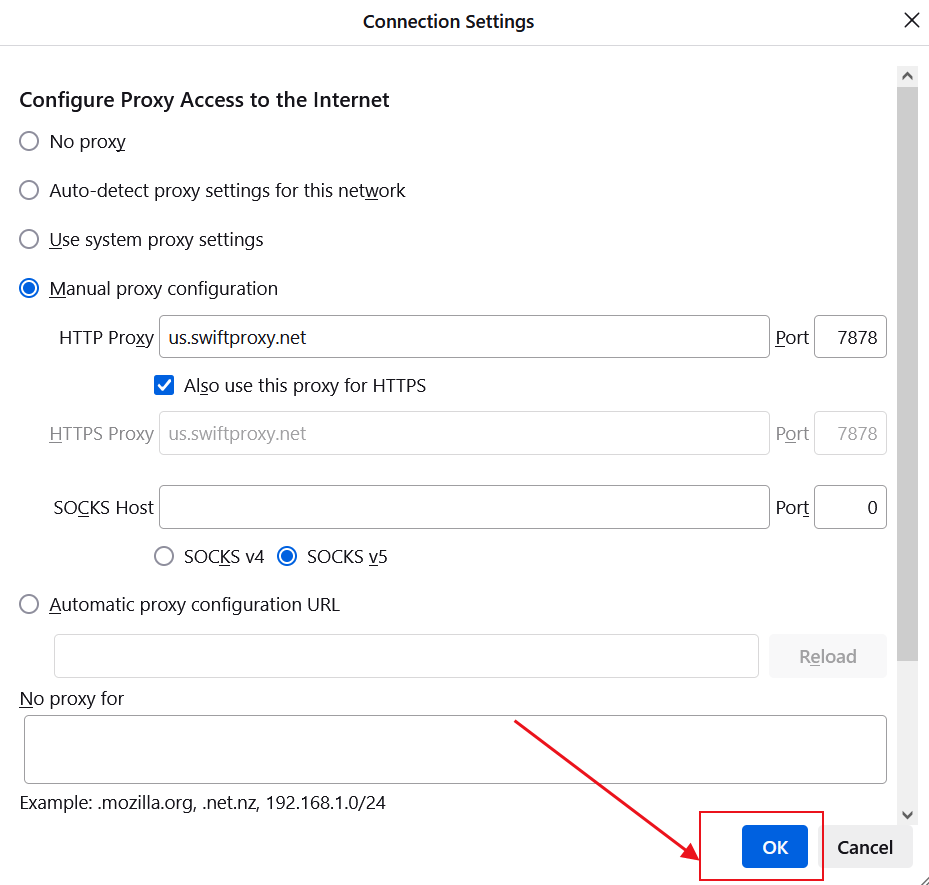
 4. Click "OK" to save the settings.
 5. Next, when you open a new page, a proxy username and password login reminder will pop up. Fill in the corresponding information in sequence and click "Sign in".
---
# Agent Instructions
This documentation is published with GitBook. GitBook is the documentation platform designed so that both humans and AI agents can read, navigate, and reason over technical content effectively. Learn more at gitbook.com.
## Querying This Documentation
If you need additional information that is not directly available in this page, you can query the documentation dynamically by asking a question.
Perform an HTTP GET request on the current page URL with the `ask` query parameter:
```
GET https://docs.swiftproxy.net/proxies/integration-and-usage/residential-proxies-integration/waterfox-browser.md?ask=
```
The question should be specific, self-contained, and written in natural language.
The response will contain a direct answer to the question and relevant excerpts and sources from the documentation.
Use this mechanism when the answer is not explicitly present in the current page, you need clarification or additional context, or you want to retrieve related documentation sections.
5. Next, when you open a new page, a proxy username and password login reminder will pop up. Fill in the corresponding information in sequence and click "Sign in".
---
# Agent Instructions
This documentation is published with GitBook. GitBook is the documentation platform designed so that both humans and AI agents can read, navigate, and reason over technical content effectively. Learn more at gitbook.com.
## Querying This Documentation
If you need additional information that is not directly available in this page, you can query the documentation dynamically by asking a question.
Perform an HTTP GET request on the current page URL with the `ask` query parameter:
```
GET https://docs.swiftproxy.net/proxies/integration-and-usage/residential-proxies-integration/waterfox-browser.md?ask=
```
The question should be specific, self-contained, and written in natural language.
The response will contain a direct answer to the question and relevant excerpts and sources from the documentation.
Use this mechanism when the answer is not explicitly present in the current page, you need clarification or additional context, or you want to retrieve related documentation sections.