> For the complete documentation index, see [llms.txt](https://docs.swiftproxy.net/llms.txt). Markdown versions of documentation pages are available by appending `.md` to page URLs; this page is available as [Markdown](https://docs.swiftproxy.net/proxies/integration-and-usage/residential-proxies-integration/gologin.md).
# Gologin
## **Why Choose Gologin?**
Choose GoLogin for efficient and secure multi-account management. It allows you to create unique profiles, set proxy locations, and share accounts with your team. With built-in high-quality proxies, AES-256 encryption, and 24/7 real-time support, GoLogin ensures data security and smooth operations. It also offers fast bulk actions and a high-performance API for enhanced efficiency.
## **How to configure Gologin with Swiftproxy Residential Proxy?**
### ▶️ **Video Tutorial**
{% embed url="" %}
### **Step 1: Get Proxy Information and Download**
1. Download Gologin from the [official website](https://gologin.com/).
2. Visit the Swiftproxy website to get your proxy IPs.
* [**API Acquisition**](/proxies/residential-proxies/get-proxy/api-acquisition.md)
* [**Username and Password Authentication**](/proxies/residential-proxies/get-proxy/user-and-password-verification.md)
### **Step 2: Configure Swiftproxy in Gologin**
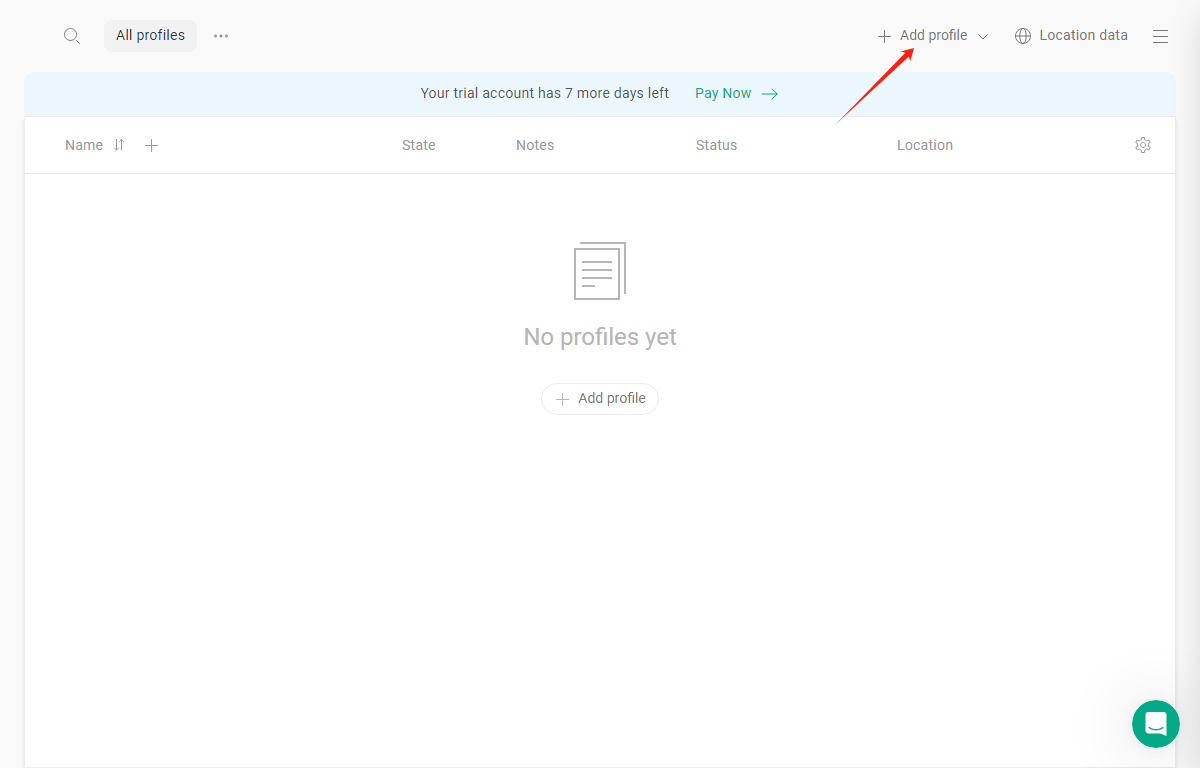
1. Once logged in, tap "Add Profile":
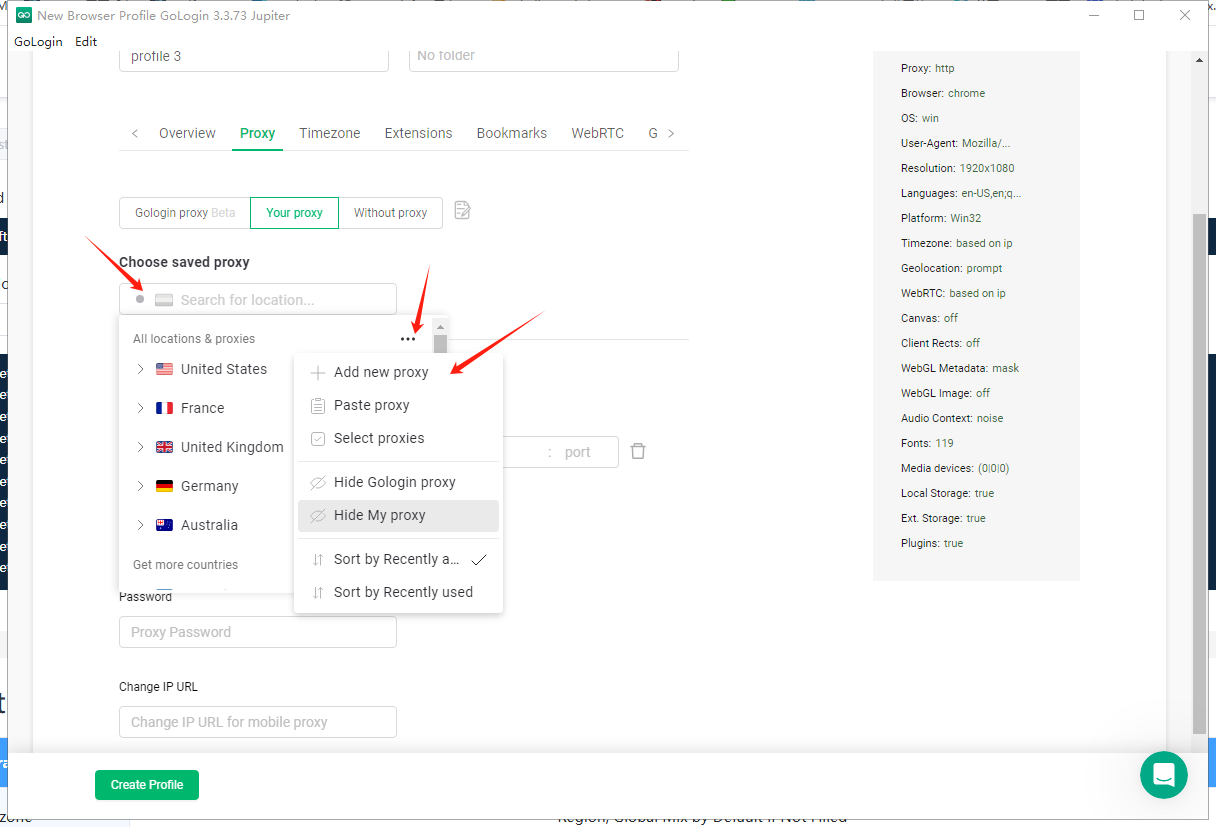
2. Tap "select saved proxy", tap the three-dot button, and tap "add new proxy".
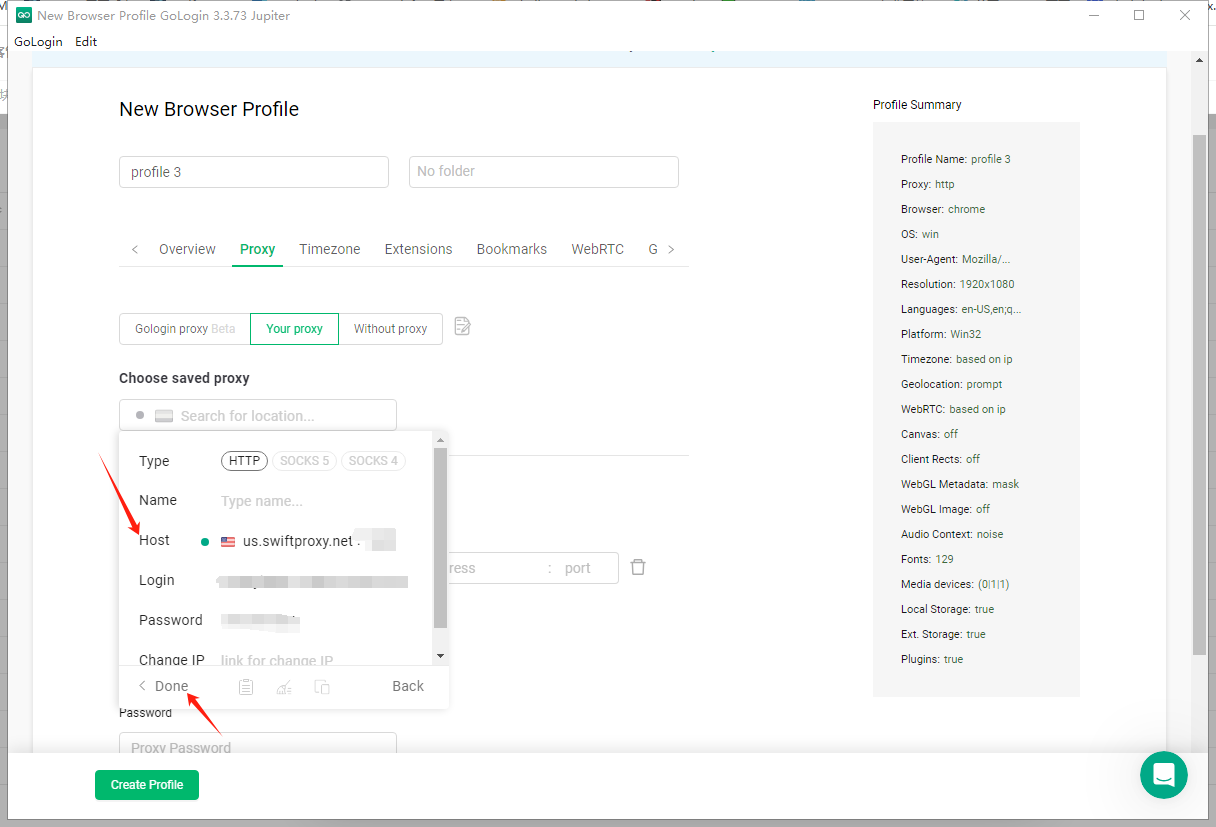
3. Paste your proxy information from the Swiftproxy dashboard, and click "done" in the end.\
**Note**: You can find the required proxy details in **Step 1.**
4. Tap "create profile".
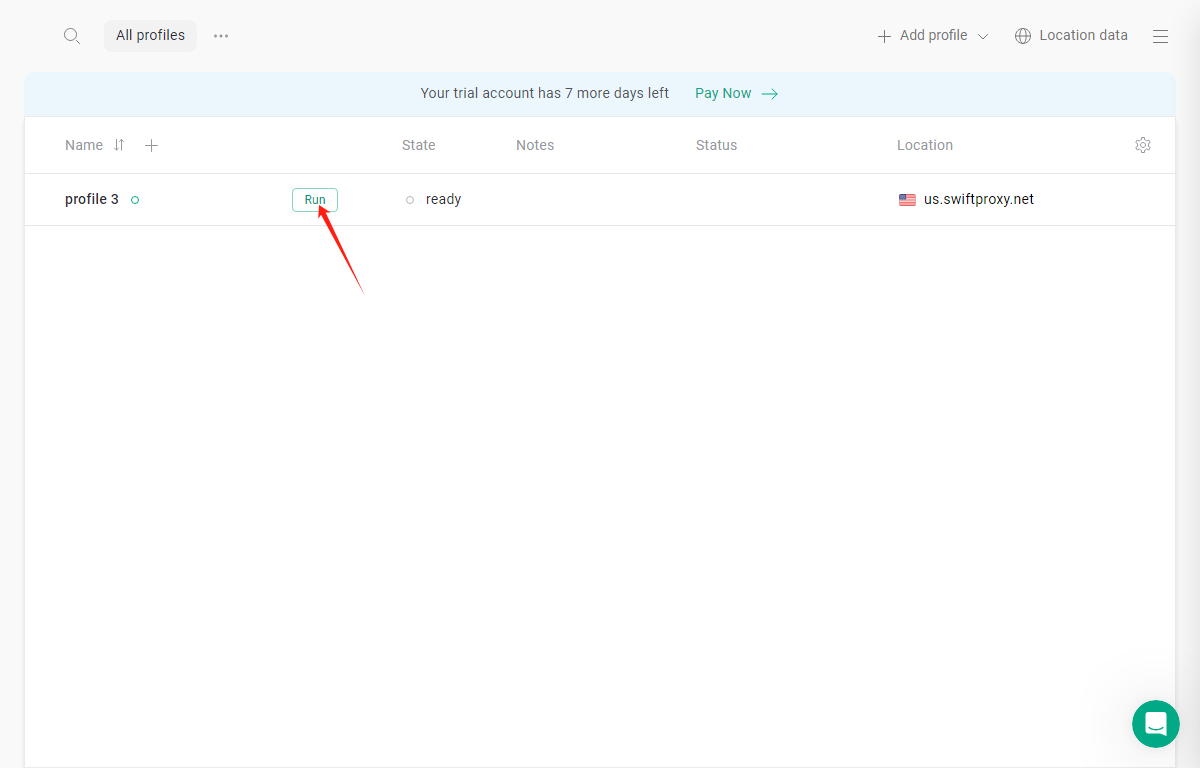
5. Tap "RUN" to open the browser window:
---
# Agent Instructions
This documentation is published with GitBook. GitBook is the documentation platform designed so that both humans and AI agents can read, navigate, and reason over technical content effectively. Learn more at gitbook.com.
## Querying This Documentation
If you need additional information that is not directly available in this page, you can query the documentation dynamically by asking a question.
Perform an HTTP GET request on the current page URL with the `ask` query parameter:
```
GET https://docs.swiftproxy.net/proxies/integration-and-usage/residential-proxies-integration/gologin.md?ask=
```
The question should be specific, self-contained, and written in natural language.
The response will contain a direct answer to the question and relevant excerpts and sources from the documentation.
Use this mechanism when the answer is not explicitly present in the current page, you need clarification or additional context, or you want to retrieve related documentation sections.
 3. Paste your proxy information from the Swiftproxy dashboard, and click "done" in the end.\
**Note**: You can find the required proxy details in **Step 1.**
3. Paste your proxy information from the Swiftproxy dashboard, and click "done" in the end.\
**Note**: You can find the required proxy details in **Step 1.**
 4. Tap "create profile".

 ---
# Agent Instructions
This documentation is published with GitBook. GitBook is the documentation platform designed so that both humans and AI agents can read, navigate, and reason over technical content effectively. Learn more at gitbook.com.
## Querying This Documentation
If you need additional information that is not directly available in this page, you can query the documentation dynamically by asking a question.
Perform an HTTP GET request on the current page URL with the `ask` query parameter:
```
GET https://docs.swiftproxy.net/proxies/integration-and-usage/residential-proxies-integration/gologin.md?ask=
---
# Agent Instructions
This documentation is published with GitBook. GitBook is the documentation platform designed so that both humans and AI agents can read, navigate, and reason over technical content effectively. Learn more at gitbook.com.
## Querying This Documentation
If you need additional information that is not directly available in this page, you can query the documentation dynamically by asking a question.
Perform an HTTP GET request on the current page URL with the `ask` query parameter:
```
GET https://docs.swiftproxy.net/proxies/integration-and-usage/residential-proxies-integration/gologin.md?ask=