> For the complete documentation index, see [llms.txt](https://docs.swiftproxy.net/llms.txt). Markdown versions of documentation pages are available by appending `.md` to page URLs; this page is available as [Markdown](https://docs.swiftproxy.net/zh-tw/dai-li/ji-cheng-dai-li/jing-tai-zhu-zhai-dai-li/lauth.md).
# Lauth
## **什麼是 Lauth?**
Lauth 瀏覽器提供進階工具,可針對每個配置檔修改瀏覽器指紋,確保每個帳號看起來都來自不同的裝置。這對於希望防止平台根據瀏覽行為關聯帳號的用戶非常重要。
## **如何配置 Lauth 和 Swiftproxy 靜態住宅代理?**
### **Step 1: 獲取代理信息與下載**
1. 從[官方網站](https://lauth.com.br/)下載並安裝 Lauth
2. 前往 Swiftproxy [用戶中心](https://www.swiftproxy.net/user/ucenter),複製用戶名、密碼、服務器名和端口
 ### **Step 2: 在 Lauth 中配置 Swiftproxy**
1. 登入後,從側邊欄選擇【Profile Configuration】
### **Step 2: 在 Lauth 中配置 Swiftproxy**
1. 登入後,從側邊欄選擇【Profile Configuration】
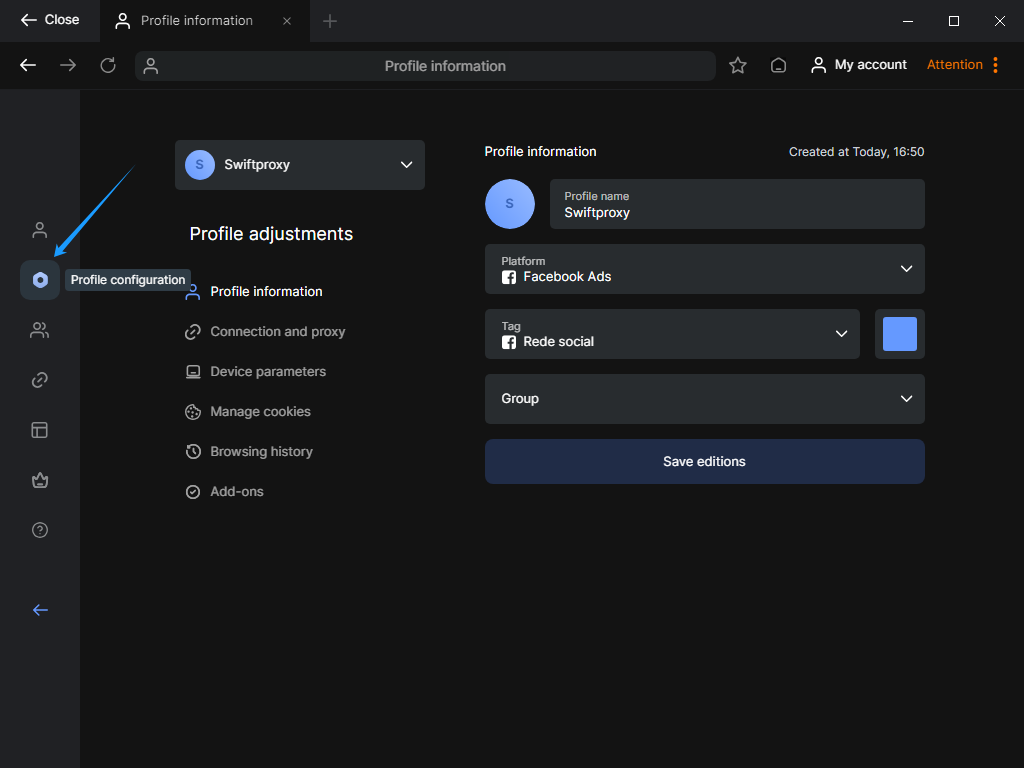 2. 在【Profile Configuration】區域,點擊主面板中的【Connection and Proxy】
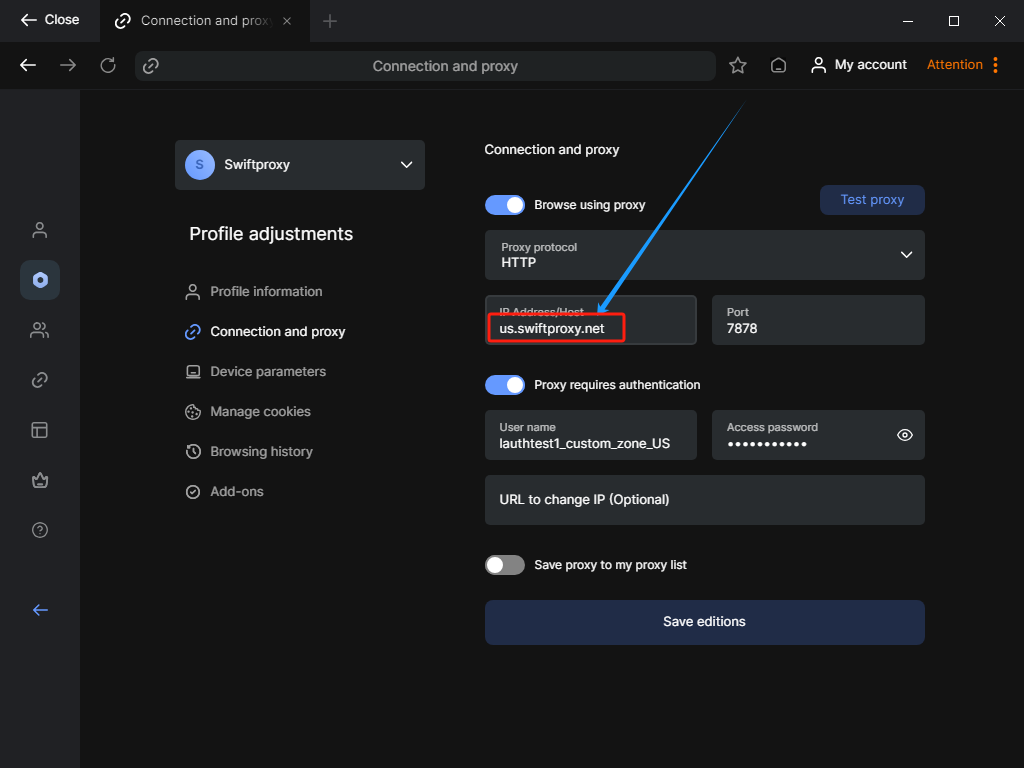
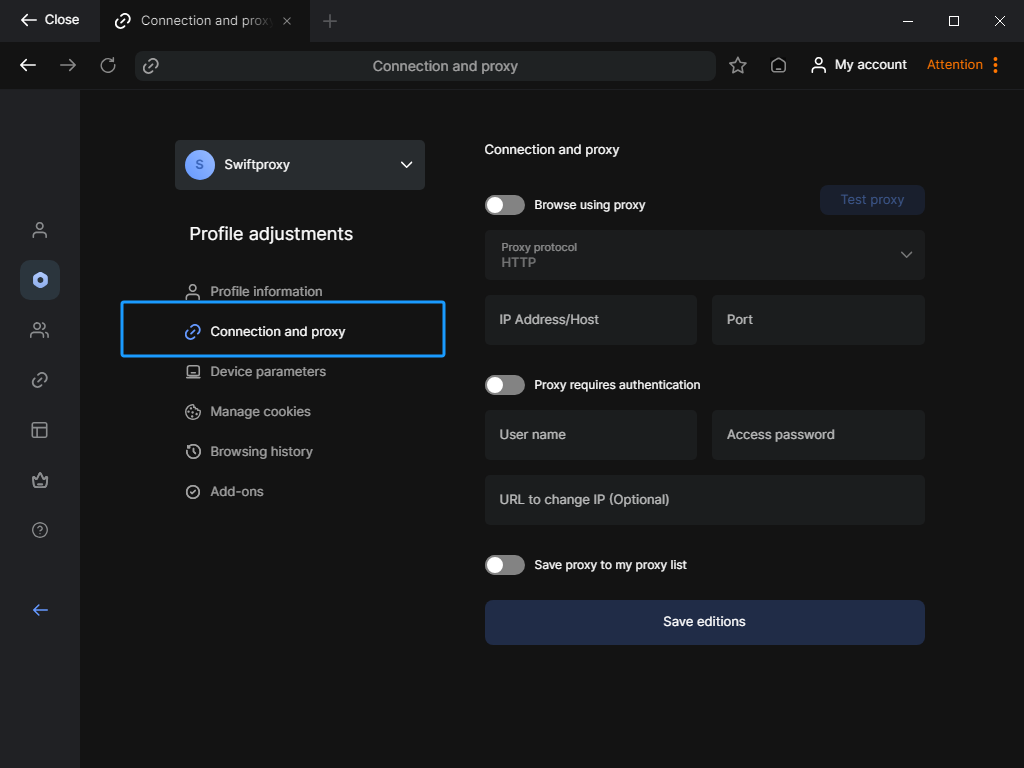 3. 要配置您的代理,請貼上用戶名、密碼、服務器名和端口\
*重要提醒:在 Lauth 的代理設定中貼上代理字串後,還需要手動再次輸入代理地址。*\
*例如,若您的代理位置設定為美國,則需在紅色欄位中將【swiftproxy.net】改為【us.swiftproxy.net】*
3. 要配置您的代理,請貼上用戶名、密碼、服務器名和端口\
*重要提醒:在 Lauth 的代理設定中貼上代理字串後,還需要手動再次輸入代理地址。*\
*例如,若您的代理位置設定為美國,則需在紅色欄位中將【swiftproxy.net】改為【us.swiftproxy.net】*
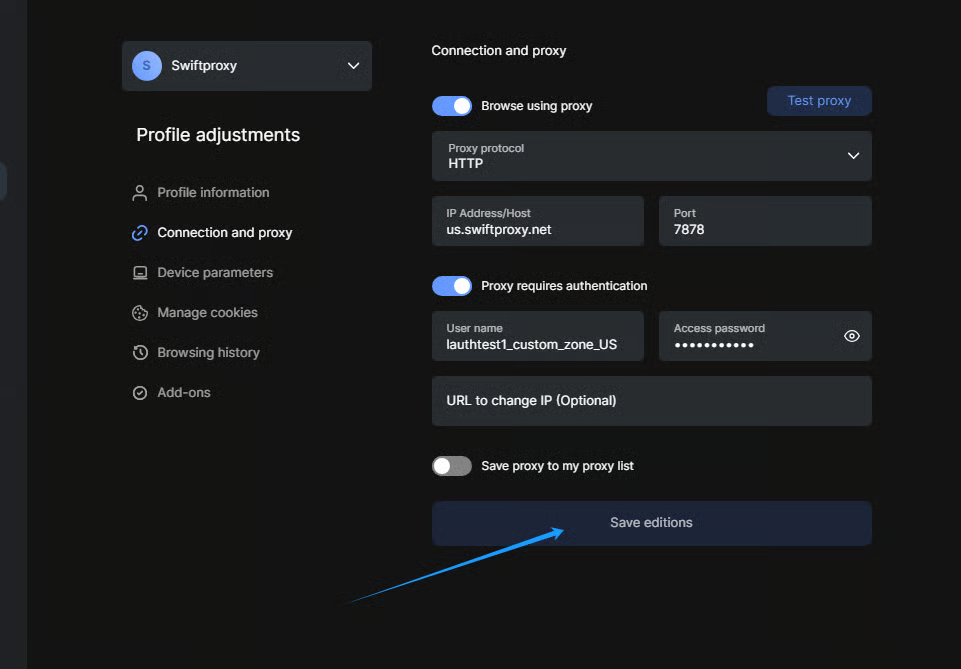
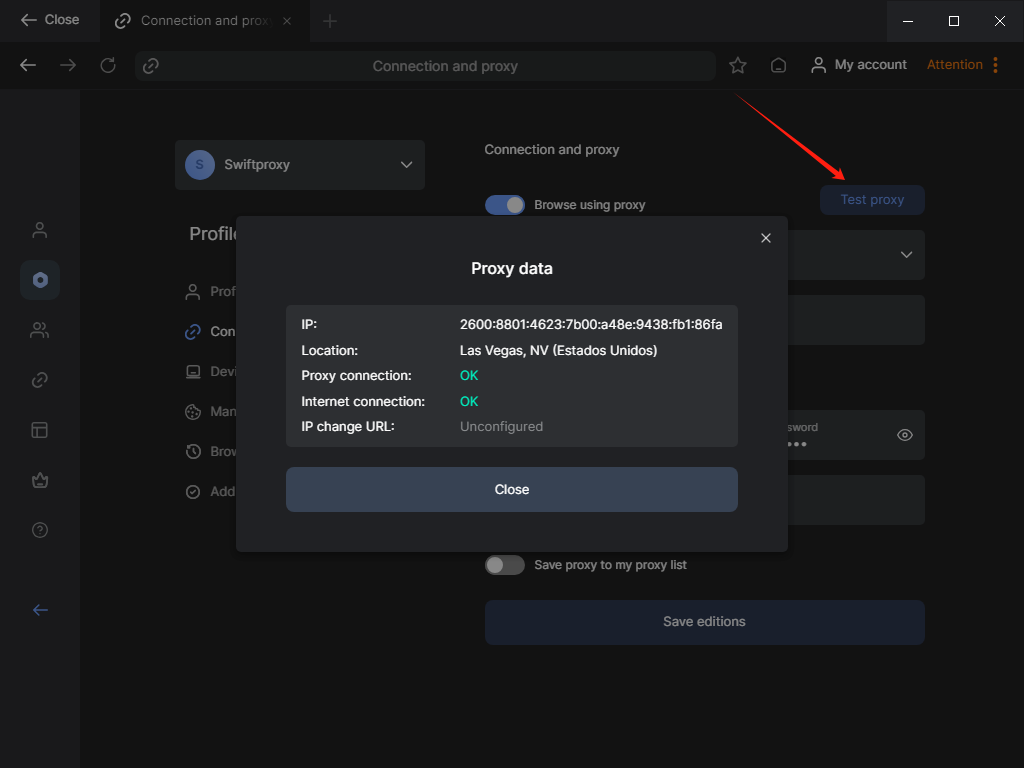
 4. 點擊【Test Proxy】按鈕,檢查代理是否已成功啟用
 5. 點擊【Save edition】以完成代理設定